

Crank Arm Removal
By Brad Quartuccio
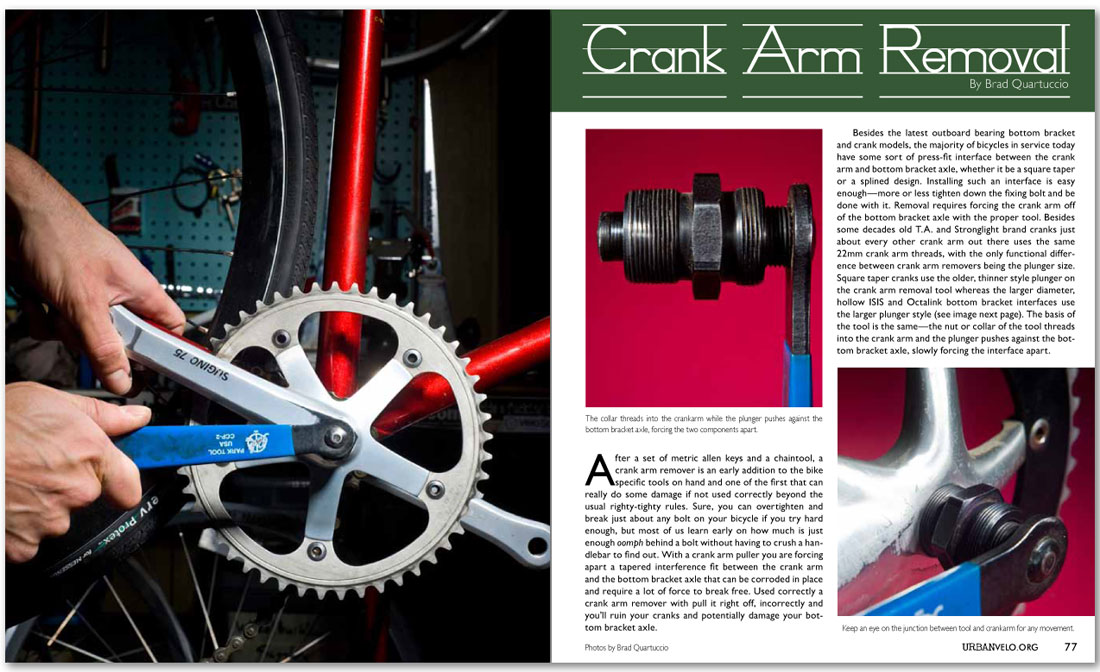
After a set of metric allen keys and a chaintool, a crank arm remover is an early addition to the bike specific tools on hand and one of the first that can really do some damage if not used correctly beyond the usual righty-tighty rules. Sure, you can overtighten and break just about any bolt on your bicycle if you try hard enough, but most of us learn early on how much is just enough oomph behind a bolt without having to crush a handlebar to find out. With a crank arm puller you are forcing apart a tapered interference fit between the crank arm and the bottom bracket axle that can be corroded in place and require a lot of force to break free. Used correctly a crank arm remover with pull it right off, incorrectly and you’ll ruin your cranks and potentially damage your bottom bracket axle.
Besides the latest outboard bearing bottom bracket and crank models, the majority of bicycles in service today have some sort of press-fit interface between the crank arm and bottom bracket axle, whether it be a square taper or a splined design. Installing such an interface is easy enough—more or less tighten down the fixing bolt and be done with it. Removal requires forcing the crank arm off of the bottom bracket axle with the proper tool. Besides some decades old T.A. and Stronglight brand cranks just about every other crank arm out there uses the same 22mm crank arm threads, with the only functional difference between crank arm removers being the plunger size. Square taper cranks use the older, thinner style plunger on the crank arm removal tool whereas the larger diameter, hollow ISIS and Octalink bottom bracket interfaces use the larger plunger style (see image next page). The basis of the tool is the same—the nut or collar of the tool threads into the crank arm and the plunger pushes against the bottom bracket axle, slowly forcing the interface apart.