|
DIY Double Toe Straps - Continued
temporary adhesive, punch rivets and the appropriate setting tool, and a refreshing beverage. This should all be readily available between the local hardware and craft stores. These could be sewn together, but few have access to a heavy-duty sewing machine so construction has been based on rivets.
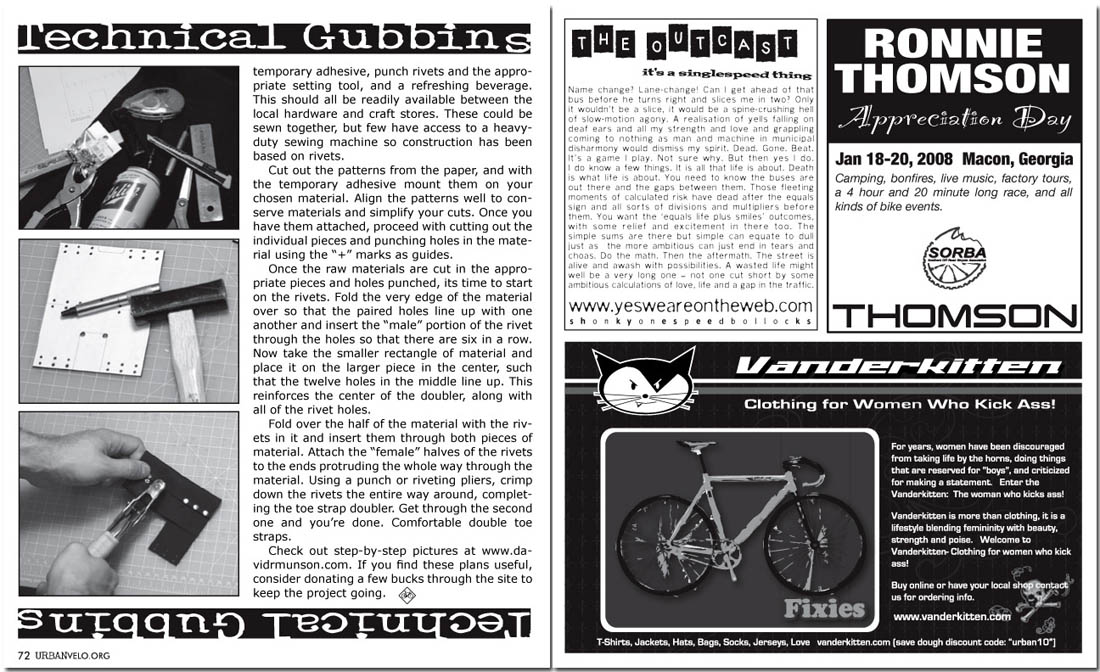
Cut out the patterns from the paper, and with the temporary adhesive mount them on your chosen material. Align the patterns well to conserve materials and simplify your cuts. Once you have them attached, proceed with cutting out the individual pieces and punching holes in the material using the “+” marks as guides.
Once the raw materials are cut in the appropriate pieces and holes punched, its time to start on the rivets. Fold the very edge of the material over so that the paired holes line up with one another and insert the “male” portion of the rivet through the holes so that there are six in a row. Now take the smaller rectangle of material and place it on the larger piece in the center, such that the twelve holes in the middle line up. This reinforces the center of the doubler, along with all of the rivet holes.
Fold over the half of the material with the rivets in it and insert them through both pieces of material. Attach the “female” halves of the rivets to the ends protruding the whole way through the material. Using a punch or riveting pliers, crimp down the rivets the entire way around, completing the toe strap doubler. Get through the second one and you’re done. Comfortable double toe straps.
Check out step-by-step pictures at www.davidrmunson.com. If you find these plans useful, consider donating a few bucks through the site to keep the project going. |
|
|
|
|
|